
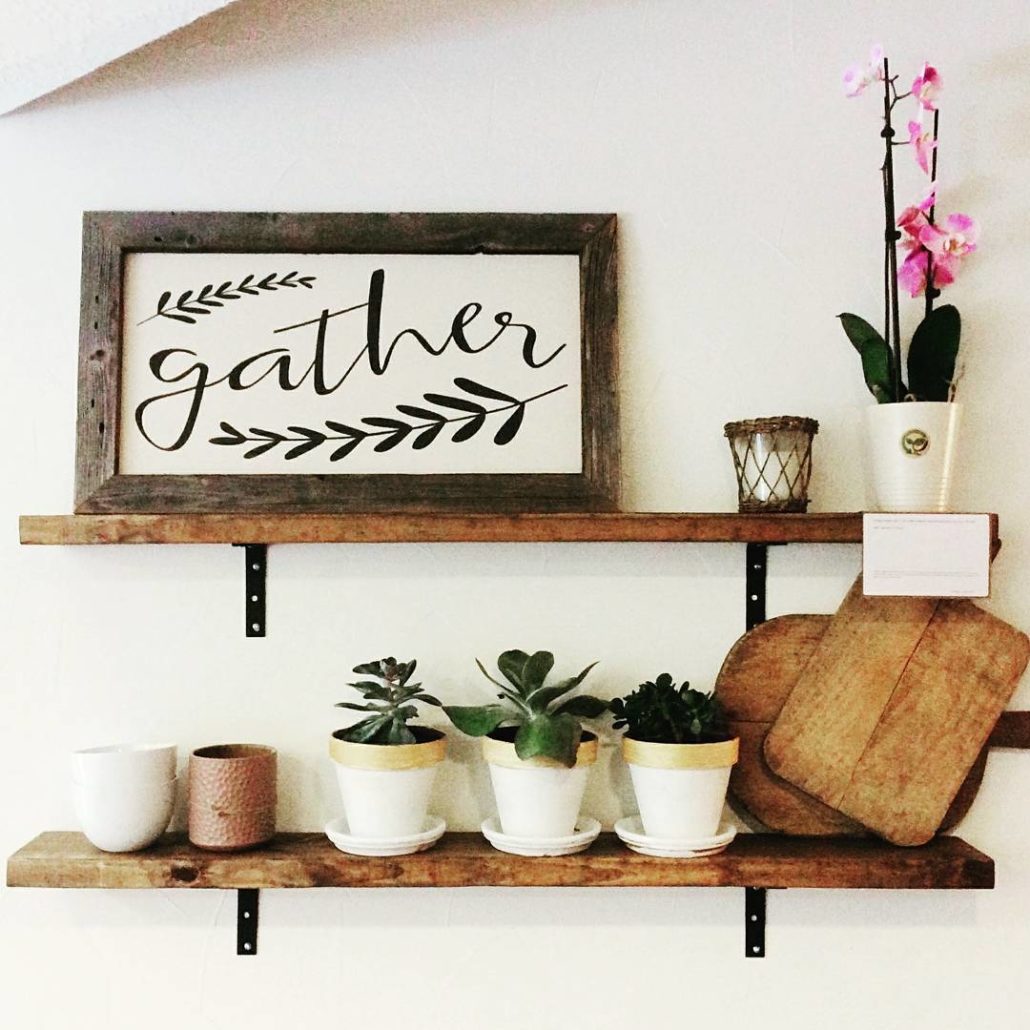
Looking for an easy, inexpensive way to add some shelving to your space? We made these modern farmhouse inspired shelves for less than $40 AND it took us under 3 hours! For those interested in making these at home, we put together a basic tutorial on how to get the same look.
What You’ll Need
Pine boards (we used pine boards that were about 6″ deep – measure out your space for the length and depth)
Stain (we used Minwax Dark Walnut stain)
Stain pads or foam brush
L Brackets
Matte black spray paint (if your L Brackets don’t come in black, you’ll need to spray paint them)
Sealer or wax (optional)
Screws
Saw
Sander and sandpaper
Level tool
Drill
Directions
1. Measure and cut the pine boards to the length you want. Be sure to buy boards that are already the correct depth – it’s not a fun extra step to try and cut them down depth wise!
2. Sand the boards. We used an orbital sander with a heavy grit sandpaper. For our project, we sanded the boards and also slightly rounded the edges. Once sanded, wipe the boards with a damp cloth and let dry.
3. Apply a coat of stain using a stain pad or foam brush (this will help get an even coat). Wipe off excess stain, let dry. Apply a second coat of stain, wipe off excess, let dry. If you like the color, stick with it (we stopped at 2 coats). You can add more stain if you want something a bit darker, but we typically don’t do more than 3 coats of stain on a project. Once the stain fully dries, you can add extra protection with sealer or wax (this step is optional).
4. If needed, spray paint your L Brackets with the matte black spray paint. You can also spray paint your screws black if you want them to match (we skipped this step).
5. Once everything is dry, grab your boards and measure out where you want everything placed. We placed our L Brackets about 10″ from the edges. Depending on the length of your boards, you may need more than two L Brackets per board.
6. Attach the L Brackets to the wall, then screw in the boards (check they are level using your level tool). Depending on your wall and how you plan to use each shelf, you may also need to use wall anchors for your screws (these will better support each shelf).
7. Step back and admire your new shelves!
See, super easy! PS – See those terra cotta planters? Those were painted using Fusion Mineral Paint products! And most of the other products in the photo are available in our shop as well 🙂

